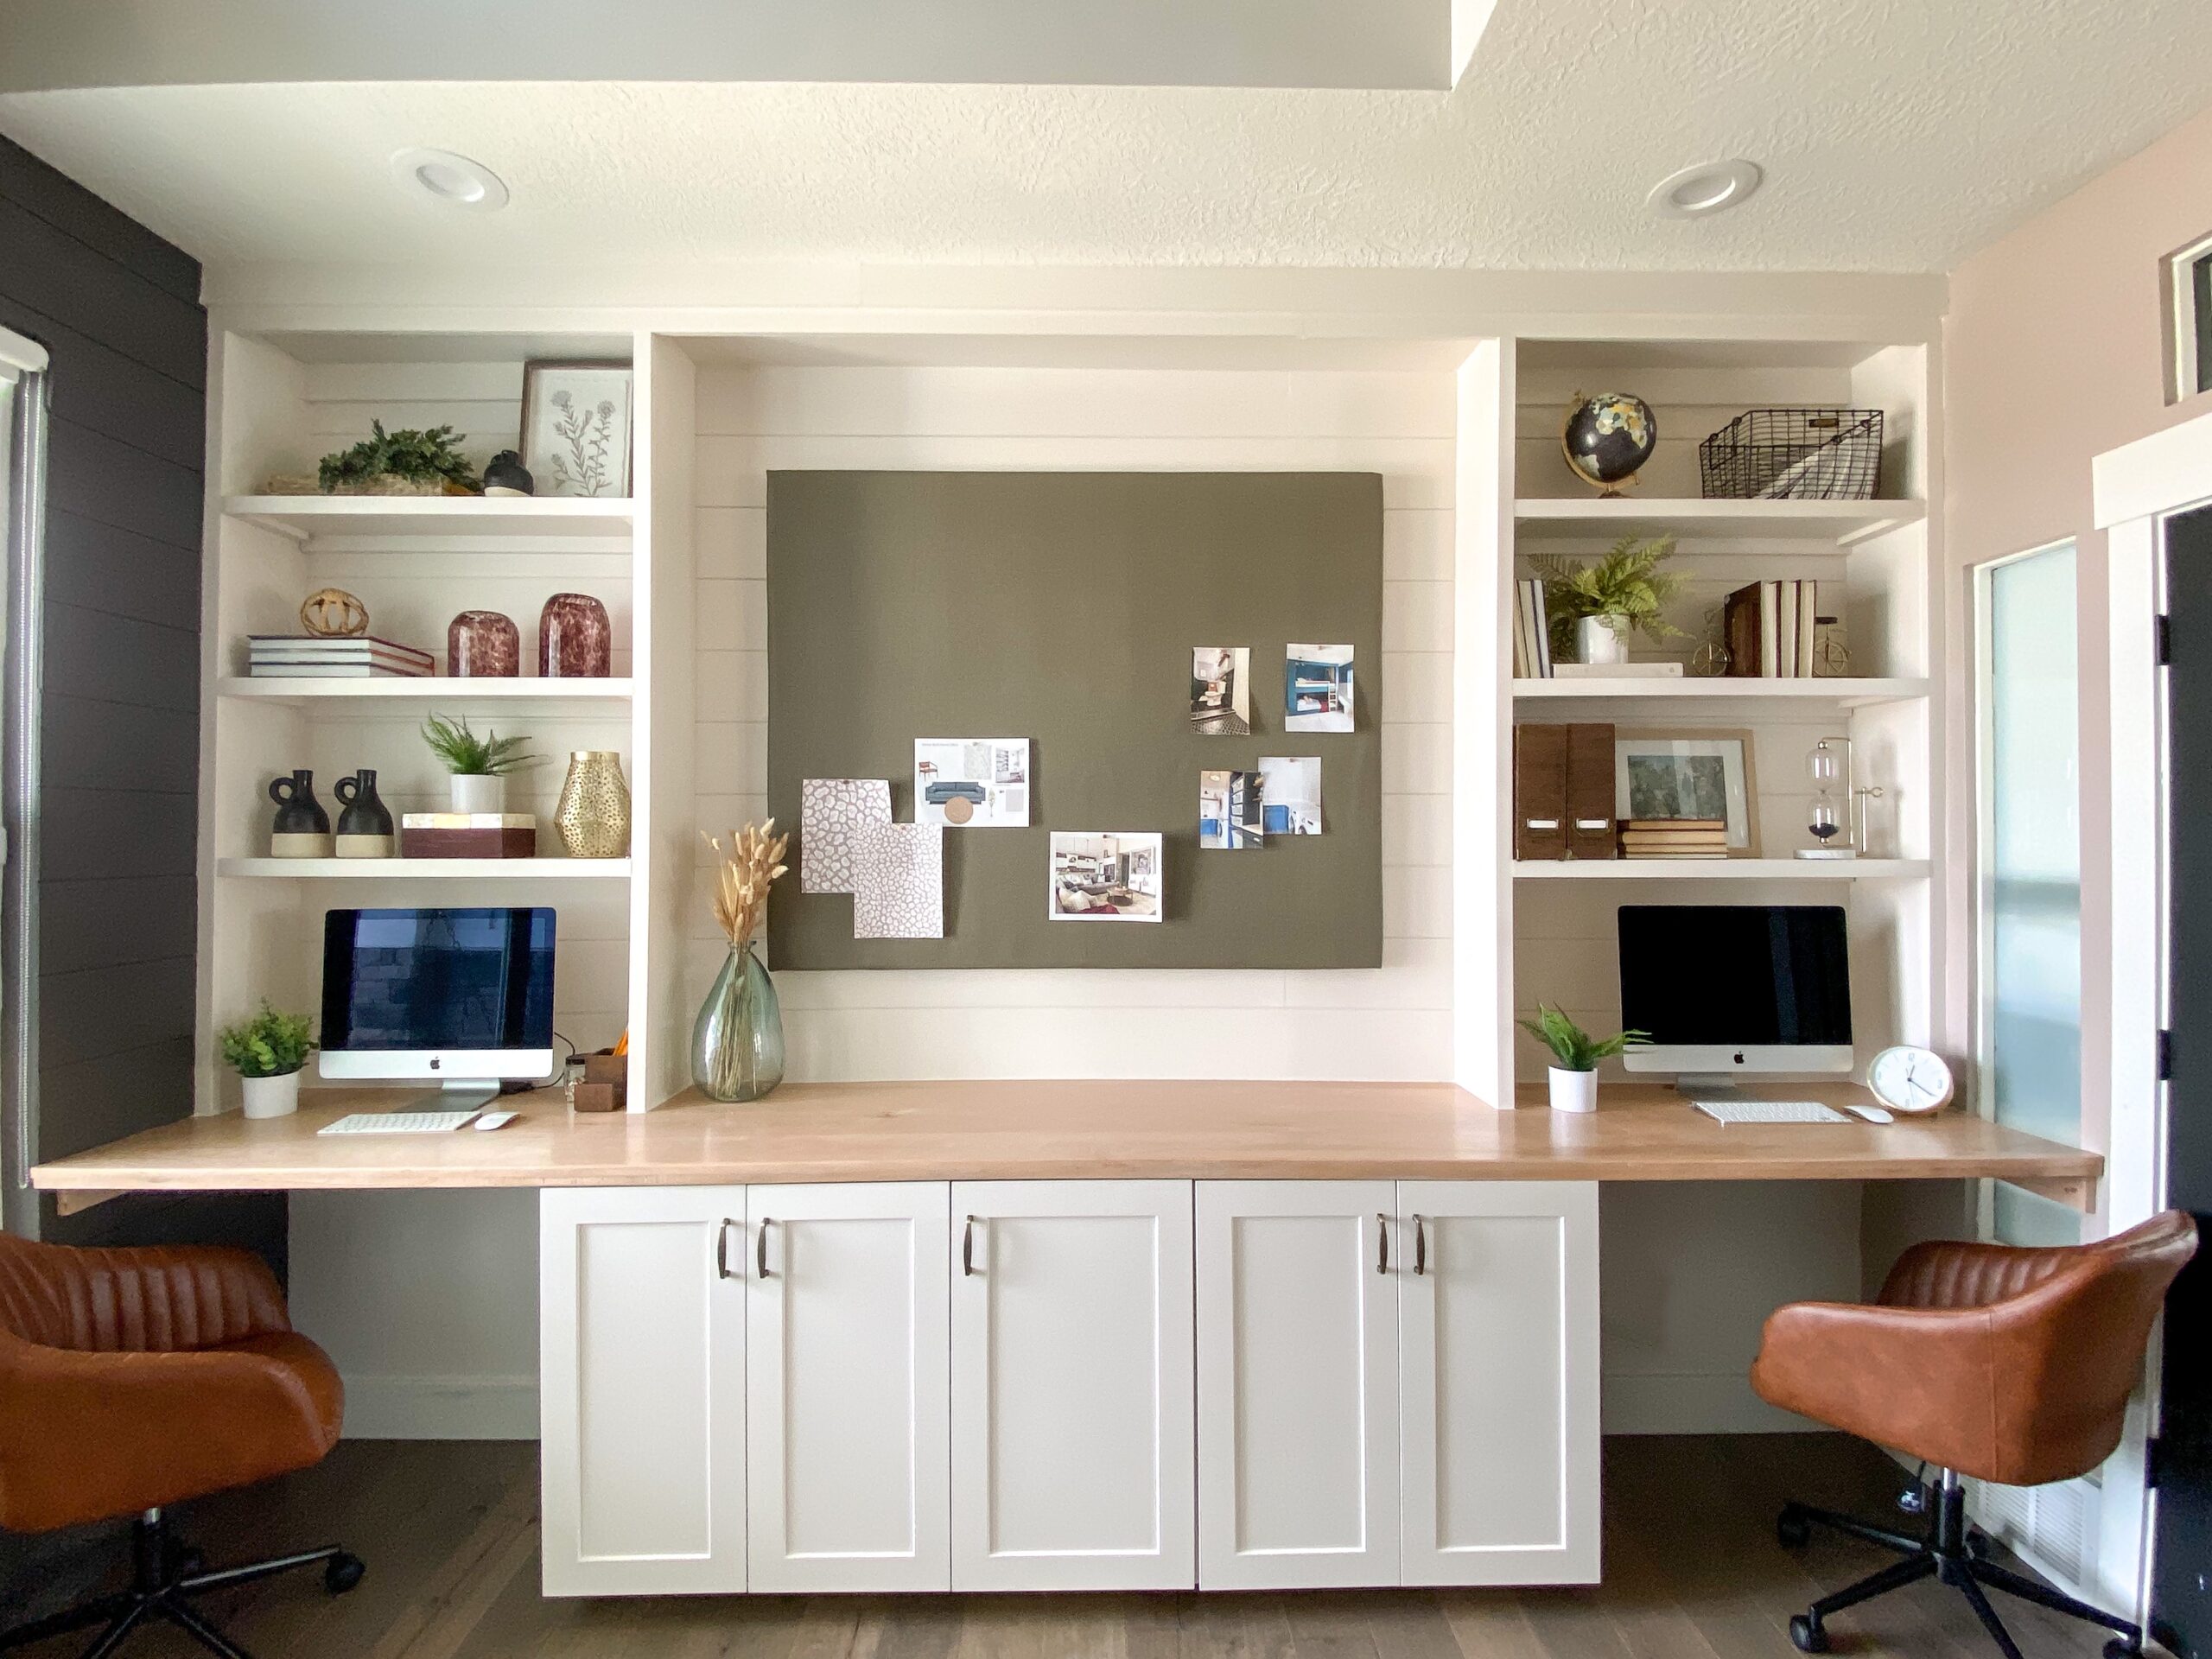


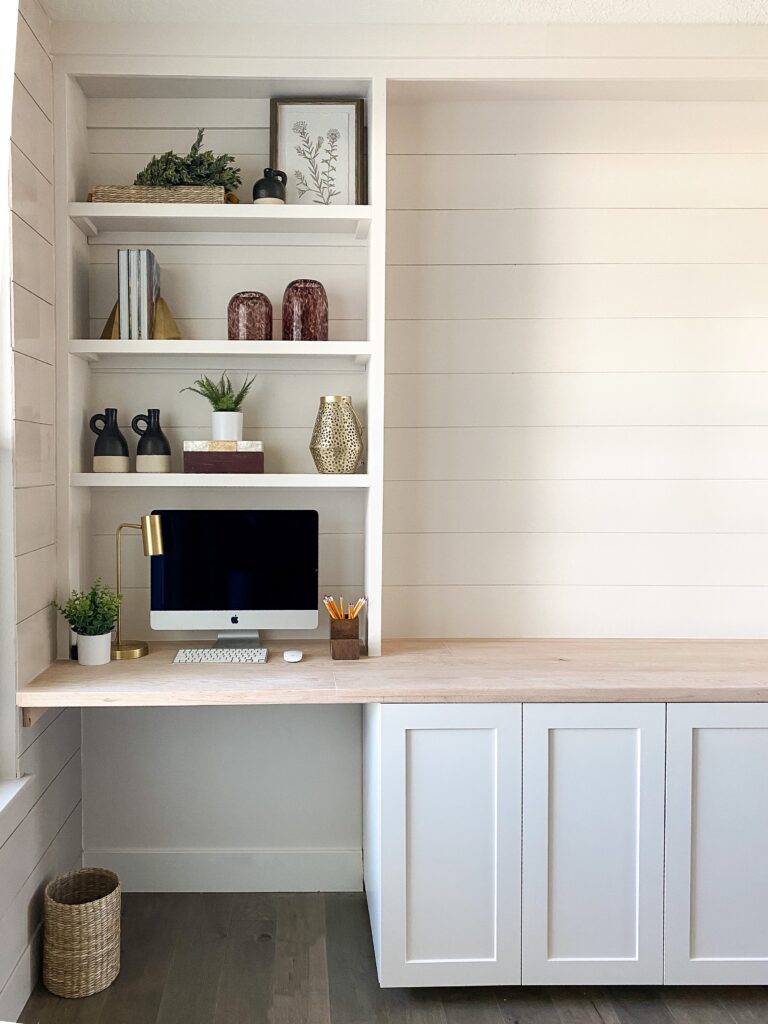
The DIY Home Office Makeover Of Your Dreams
Contributed by Christine Gummersall of Honey Built Home
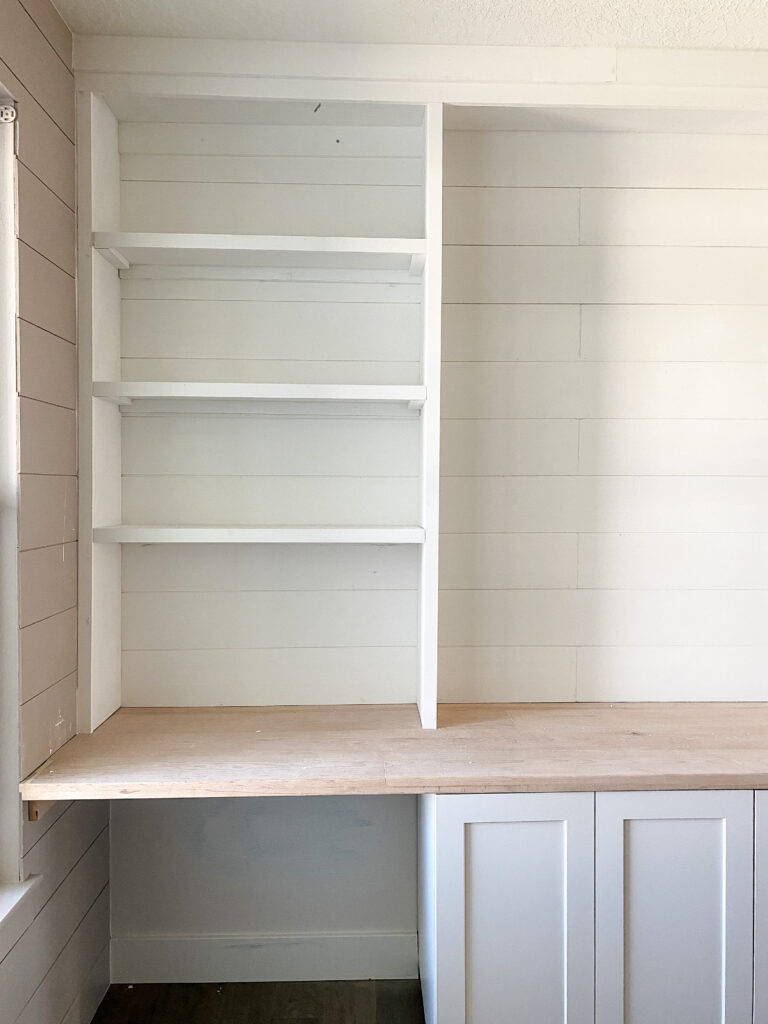
Searching for inspiration for the perfect home office refresh? Look no further than this incredible DIY built-in bookcase! The built-in bookcases featured in this home office were built identically and mounted to the walls of the space, but could be constructed to stand alone on the floor as a traditional bookcase instead of as part of a built-in. Keep reading to learn how to create the 70” bookcase shown below, using Royal® PVC Board!
Material list:
1”x 2”x8’ (0.75-in x 1.5-in x 8-ft) Royal® PVC Board
1”x10”x8’ (0.75-in x 9.25-in x 8-ft) Royal® PVC Board
PVC Cement
2” screws
1 1/4” 18 gauge brad nails
220 grit sandpaper/sanding block
1 1/4” Kreg Pocket Screws
Paint (optional)
Tools needed:
Miter Saw
Drill
Level
18 gauge brad nailer
Drill bit
Kreg Jig
Clamps
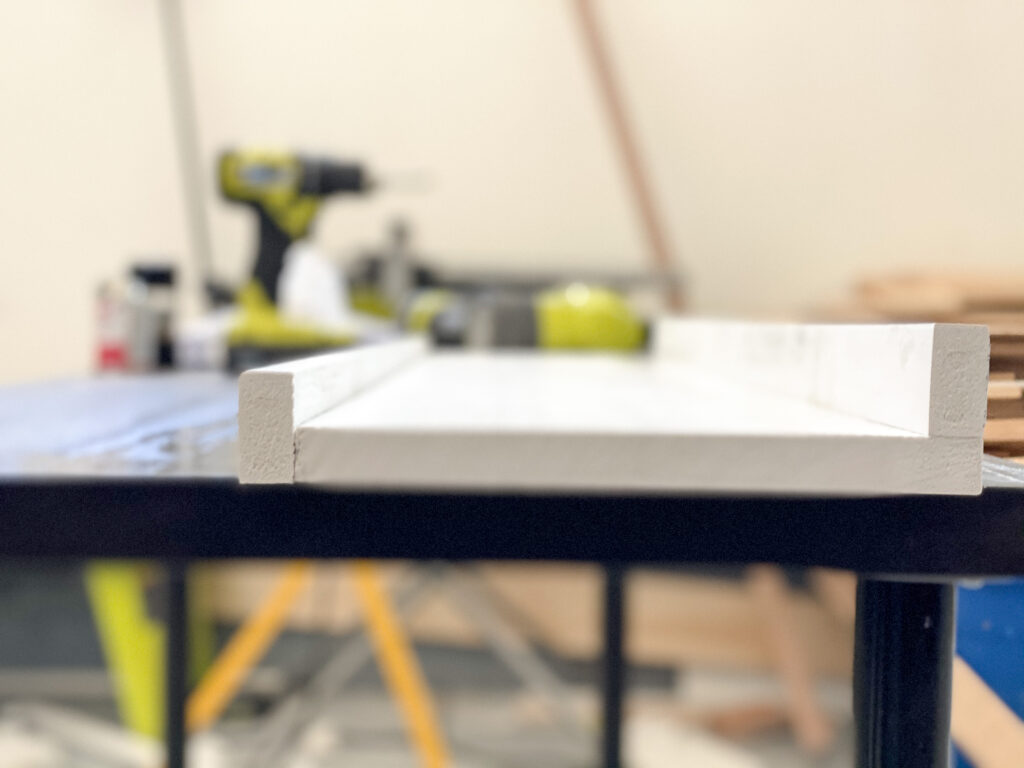
Royal® PVC Board features one side that is a wood grain texture, and the other side has a smooth finish. First, determine which side you want visible. For these built-ins, the wood grain texture is facing down on each shelf so the underside is textured. For the rectangular bookcase, the wood grain is butted up to the wall so the smooth side is shown on the inside of the bookcase.
Building the rectangle:
Measure and cut two 1×10” wide PVC boards to the height of the bookcase (these are 70”) and one 1×10” wide PVC board the desired width (in this case, 36”). If this is a standalone bookcase, cut two 1×10” boards at 36”, one for the top and one for the bottom.
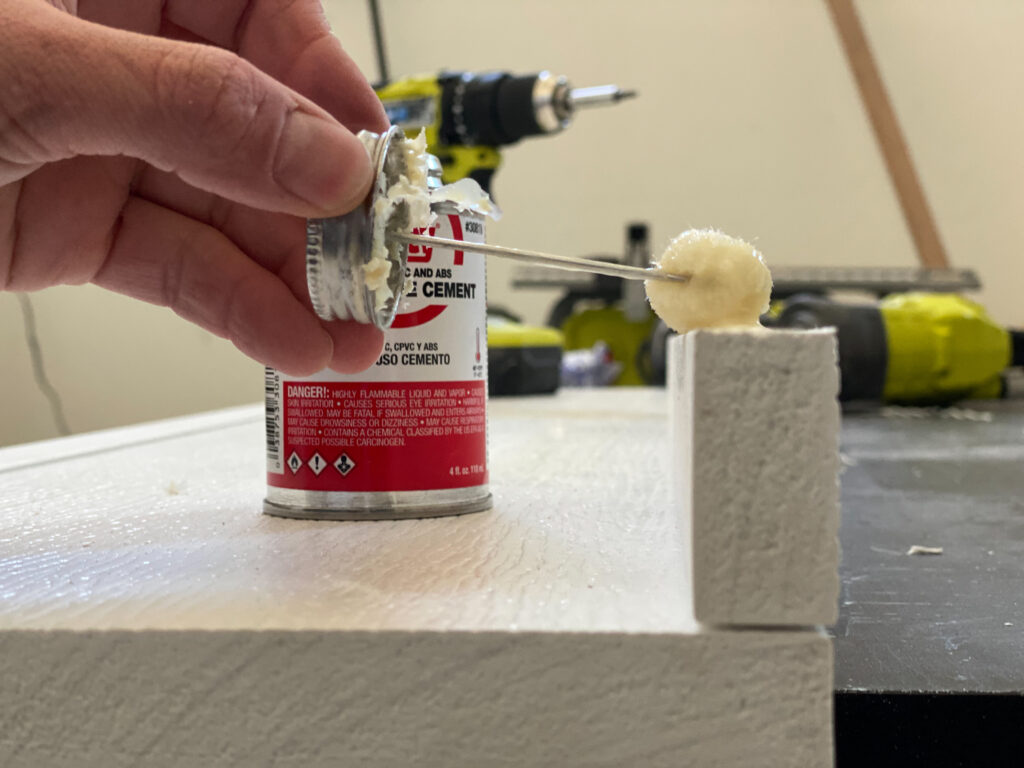
To attach the boards, first pre-drill three holes on each end of the 36” top (and bottom) boards. Then apply PVC cement and drill a 2” screw from the top board into the lip of the long side of the boards. This should make a solid rectangle.
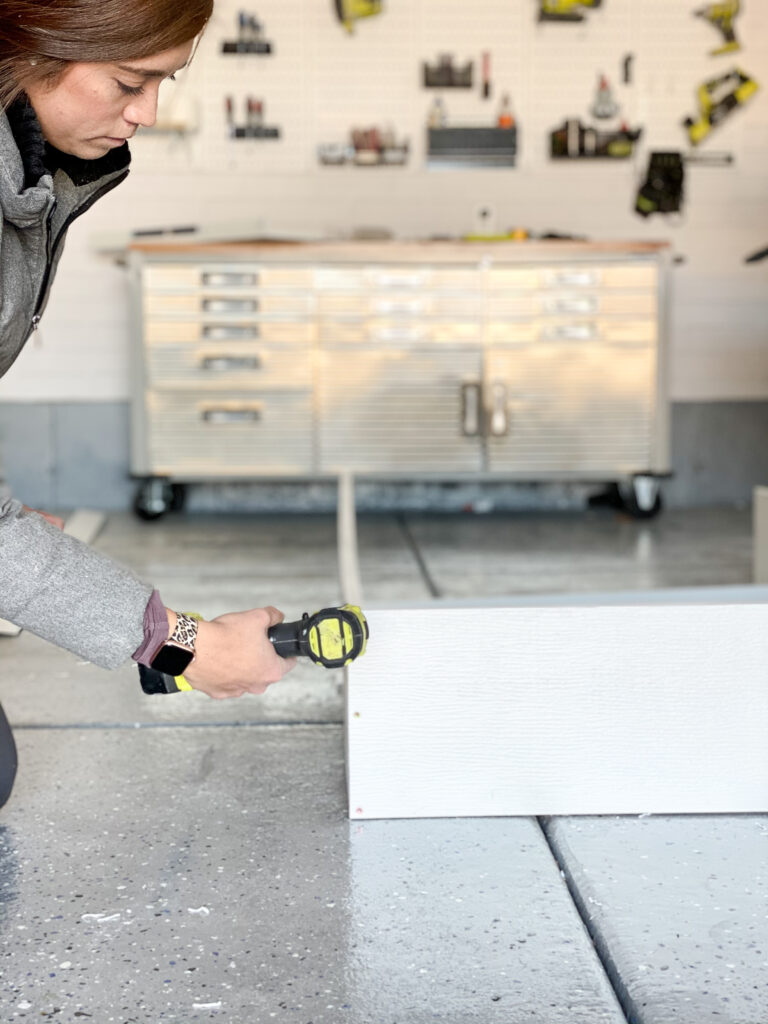
Cut a 1×4” board to fit in the top corner of the bookcase. Drill four pocket holes, two on each side. Attach the 1×4” board to the back top of the bookcase using 1 1/4” kreg screws. These back support pieces will be secured into the studs on the wall to anchor the bookcase to the wall.
Build each shelf:
Cut one 1×10” board to a length of 36” (or desired length) and two 1×2” boards to the same length.

Turn one 1 1/2” board on its side and pre-drill three screw holes. Apply a layer of PVC cement to the other side of the 1×2” board, line up with the 1×10” board, and attach with a 2” screw straight through the 1×2” board and into the 1×10” board.
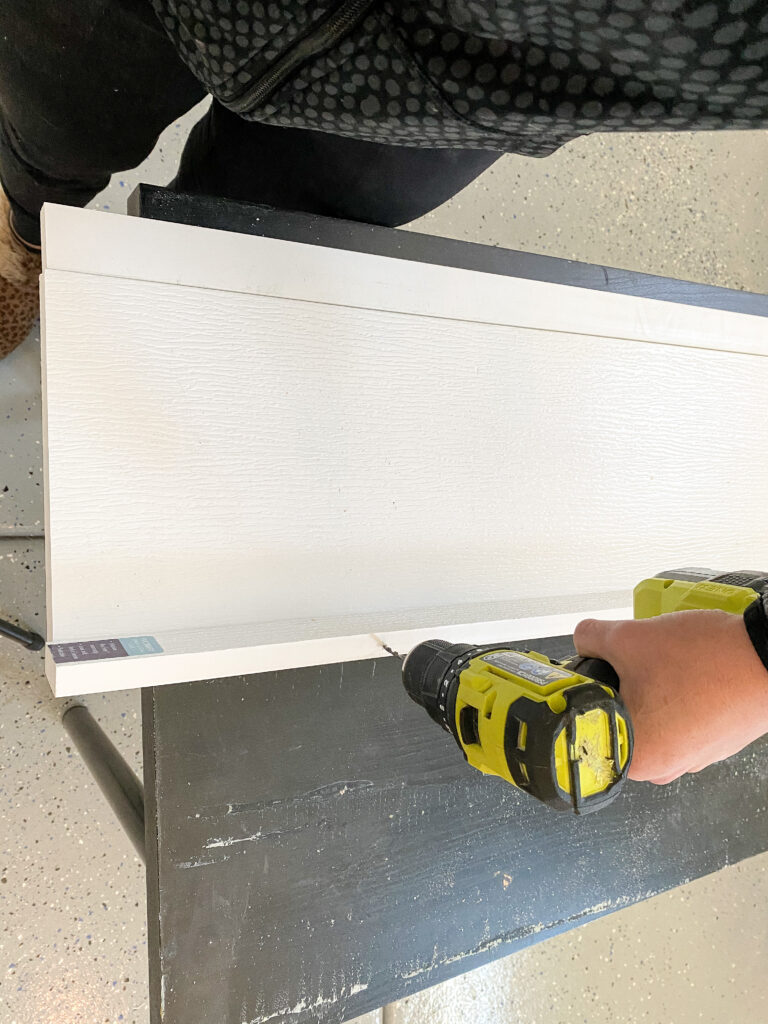
This will serve as the structural support for the shelf.
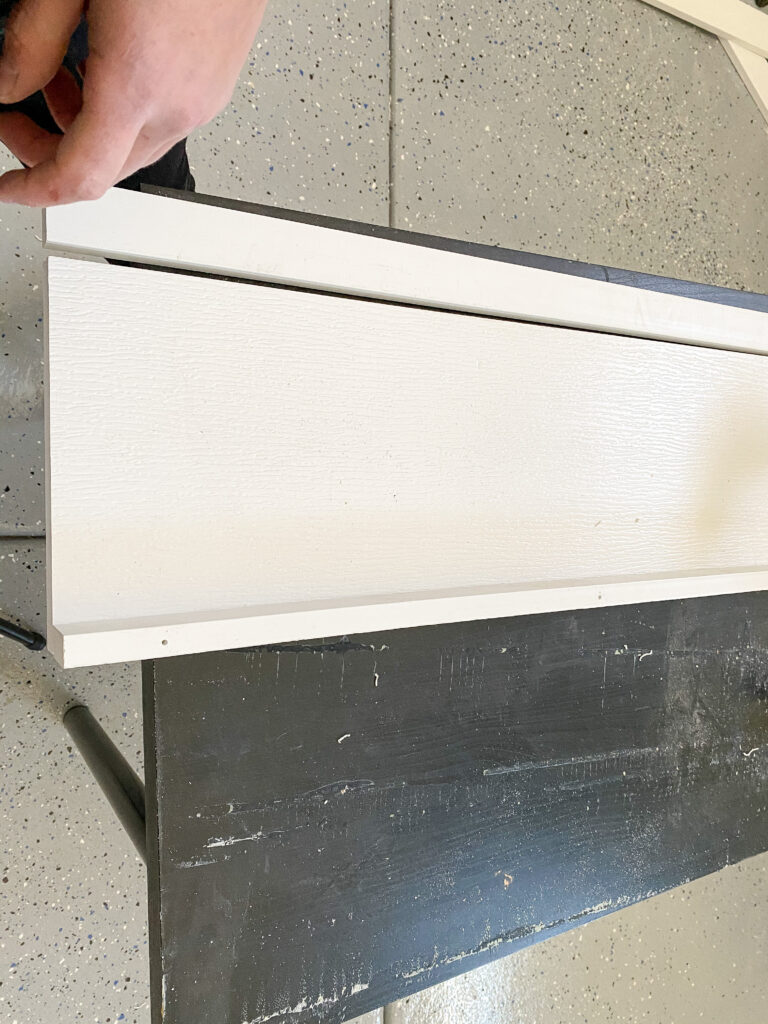
Optional: Apply PVC cement to half of the other 1×2” board and the front edge of the shelf. Line up and insert in 1 1/4” 18 gauge brad nails. This board serves as the face frame/front edge of the shelf.
Repeat above steps for as many shelves as you are building.
Attach the shelves to the bookcase:
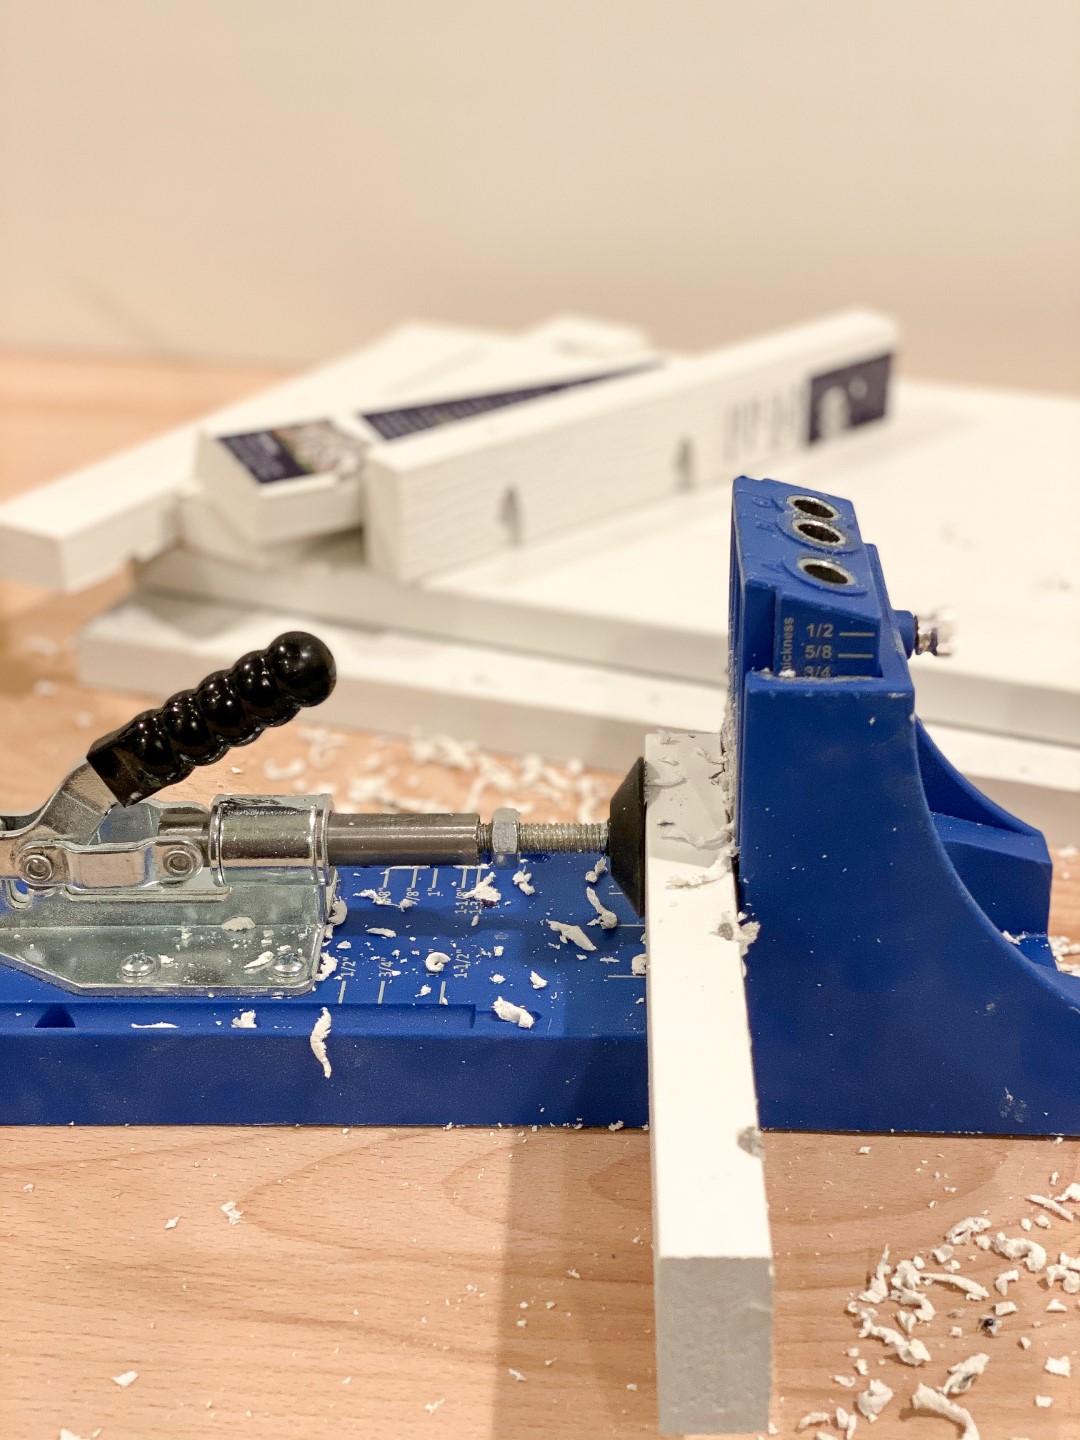
To attach the shelves to the bookcase it works well to create side supports that are pocket screwed into the sides of the bookcase. Cut two (per shelf) 1×2” boards to 8 3/4” in length.
Use a kreg jig to drill pocket holes into the side support. Use 1 1/4” kreg pocket screws, PVC cement, and a level to secure the boards directly into the side of the bookcase.
Place the shelf on top of the side supports.
Optional: To create the face frame, attach a 1×2” board to the edge of the 70” bookcase rectangle using PVC cement and 18 gauge brad nails.
The built-in header of this particular bookcase is a 1×6” board topped with a 1×4” board directly on top.
Prep for paint:
Fill any nail/screw holes with wood filler and caulk seams with a paintable caulk. Sand wood filler smoothly with 220 grit sandpaper. This PVC bookcase can be left as-is, but is also paintable with 100% acrylic paint. I painted with Sherwin Williams SW0053 Porcelain in Emerald with a satin finish.
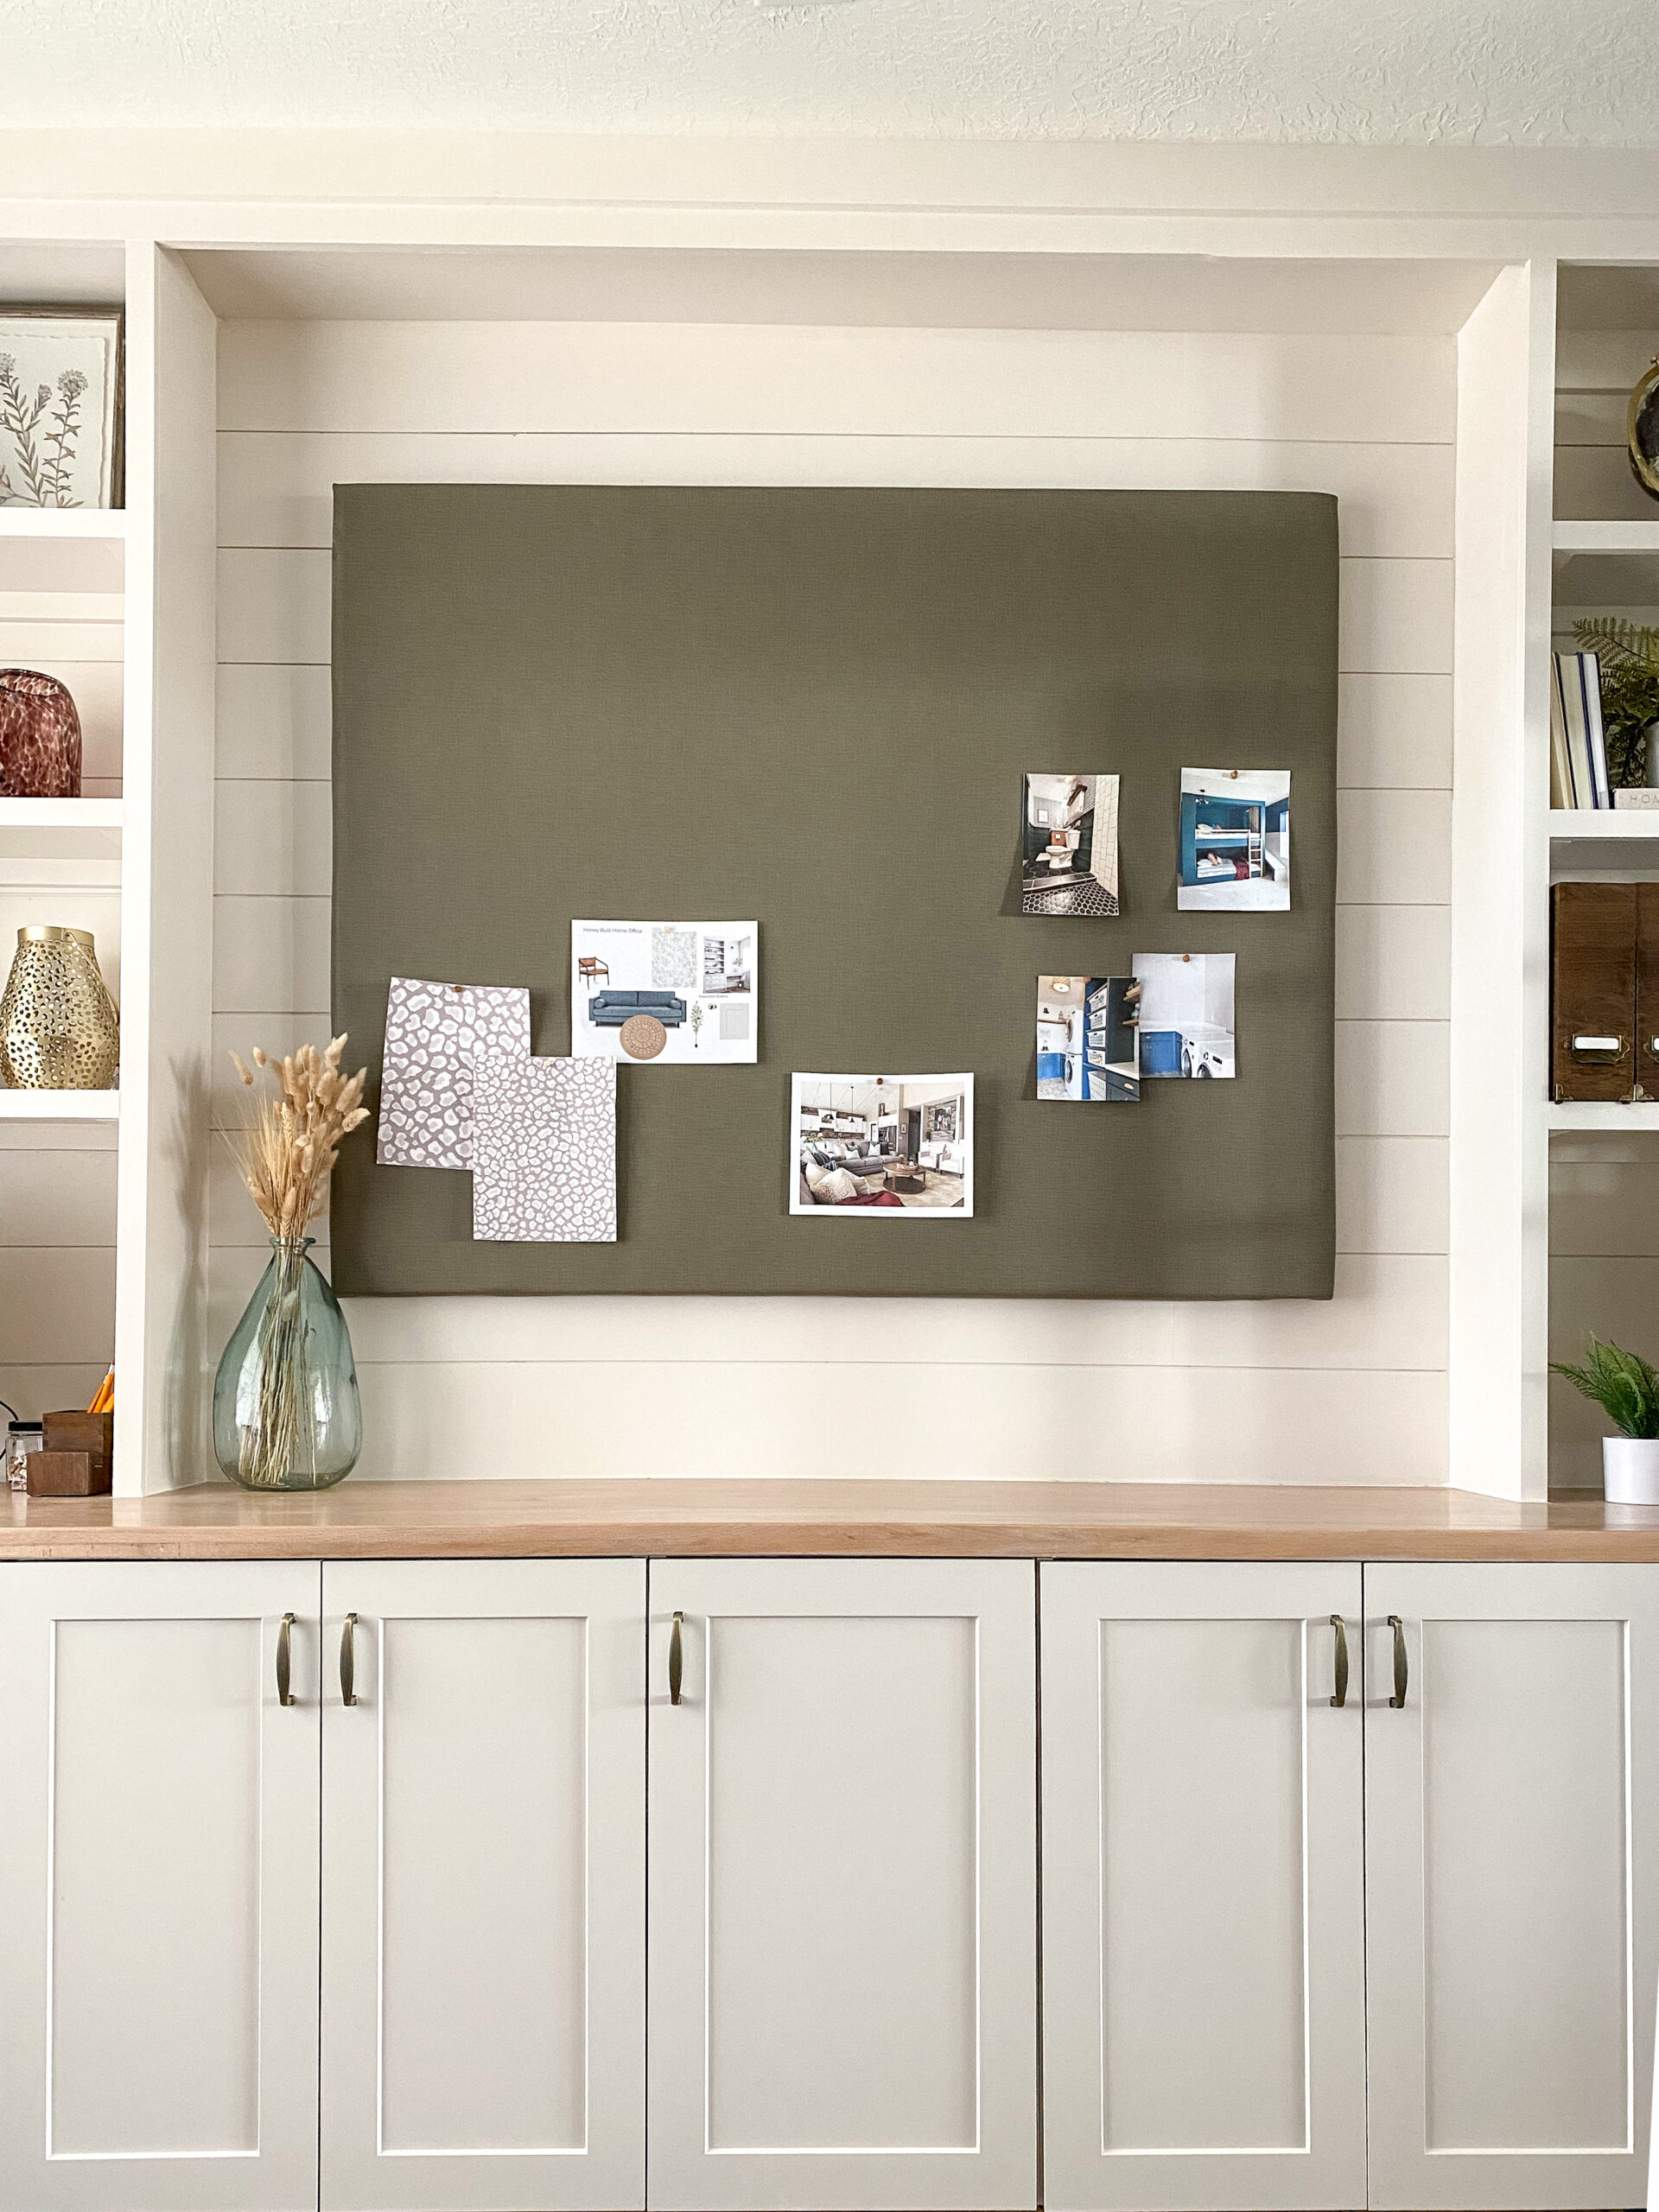
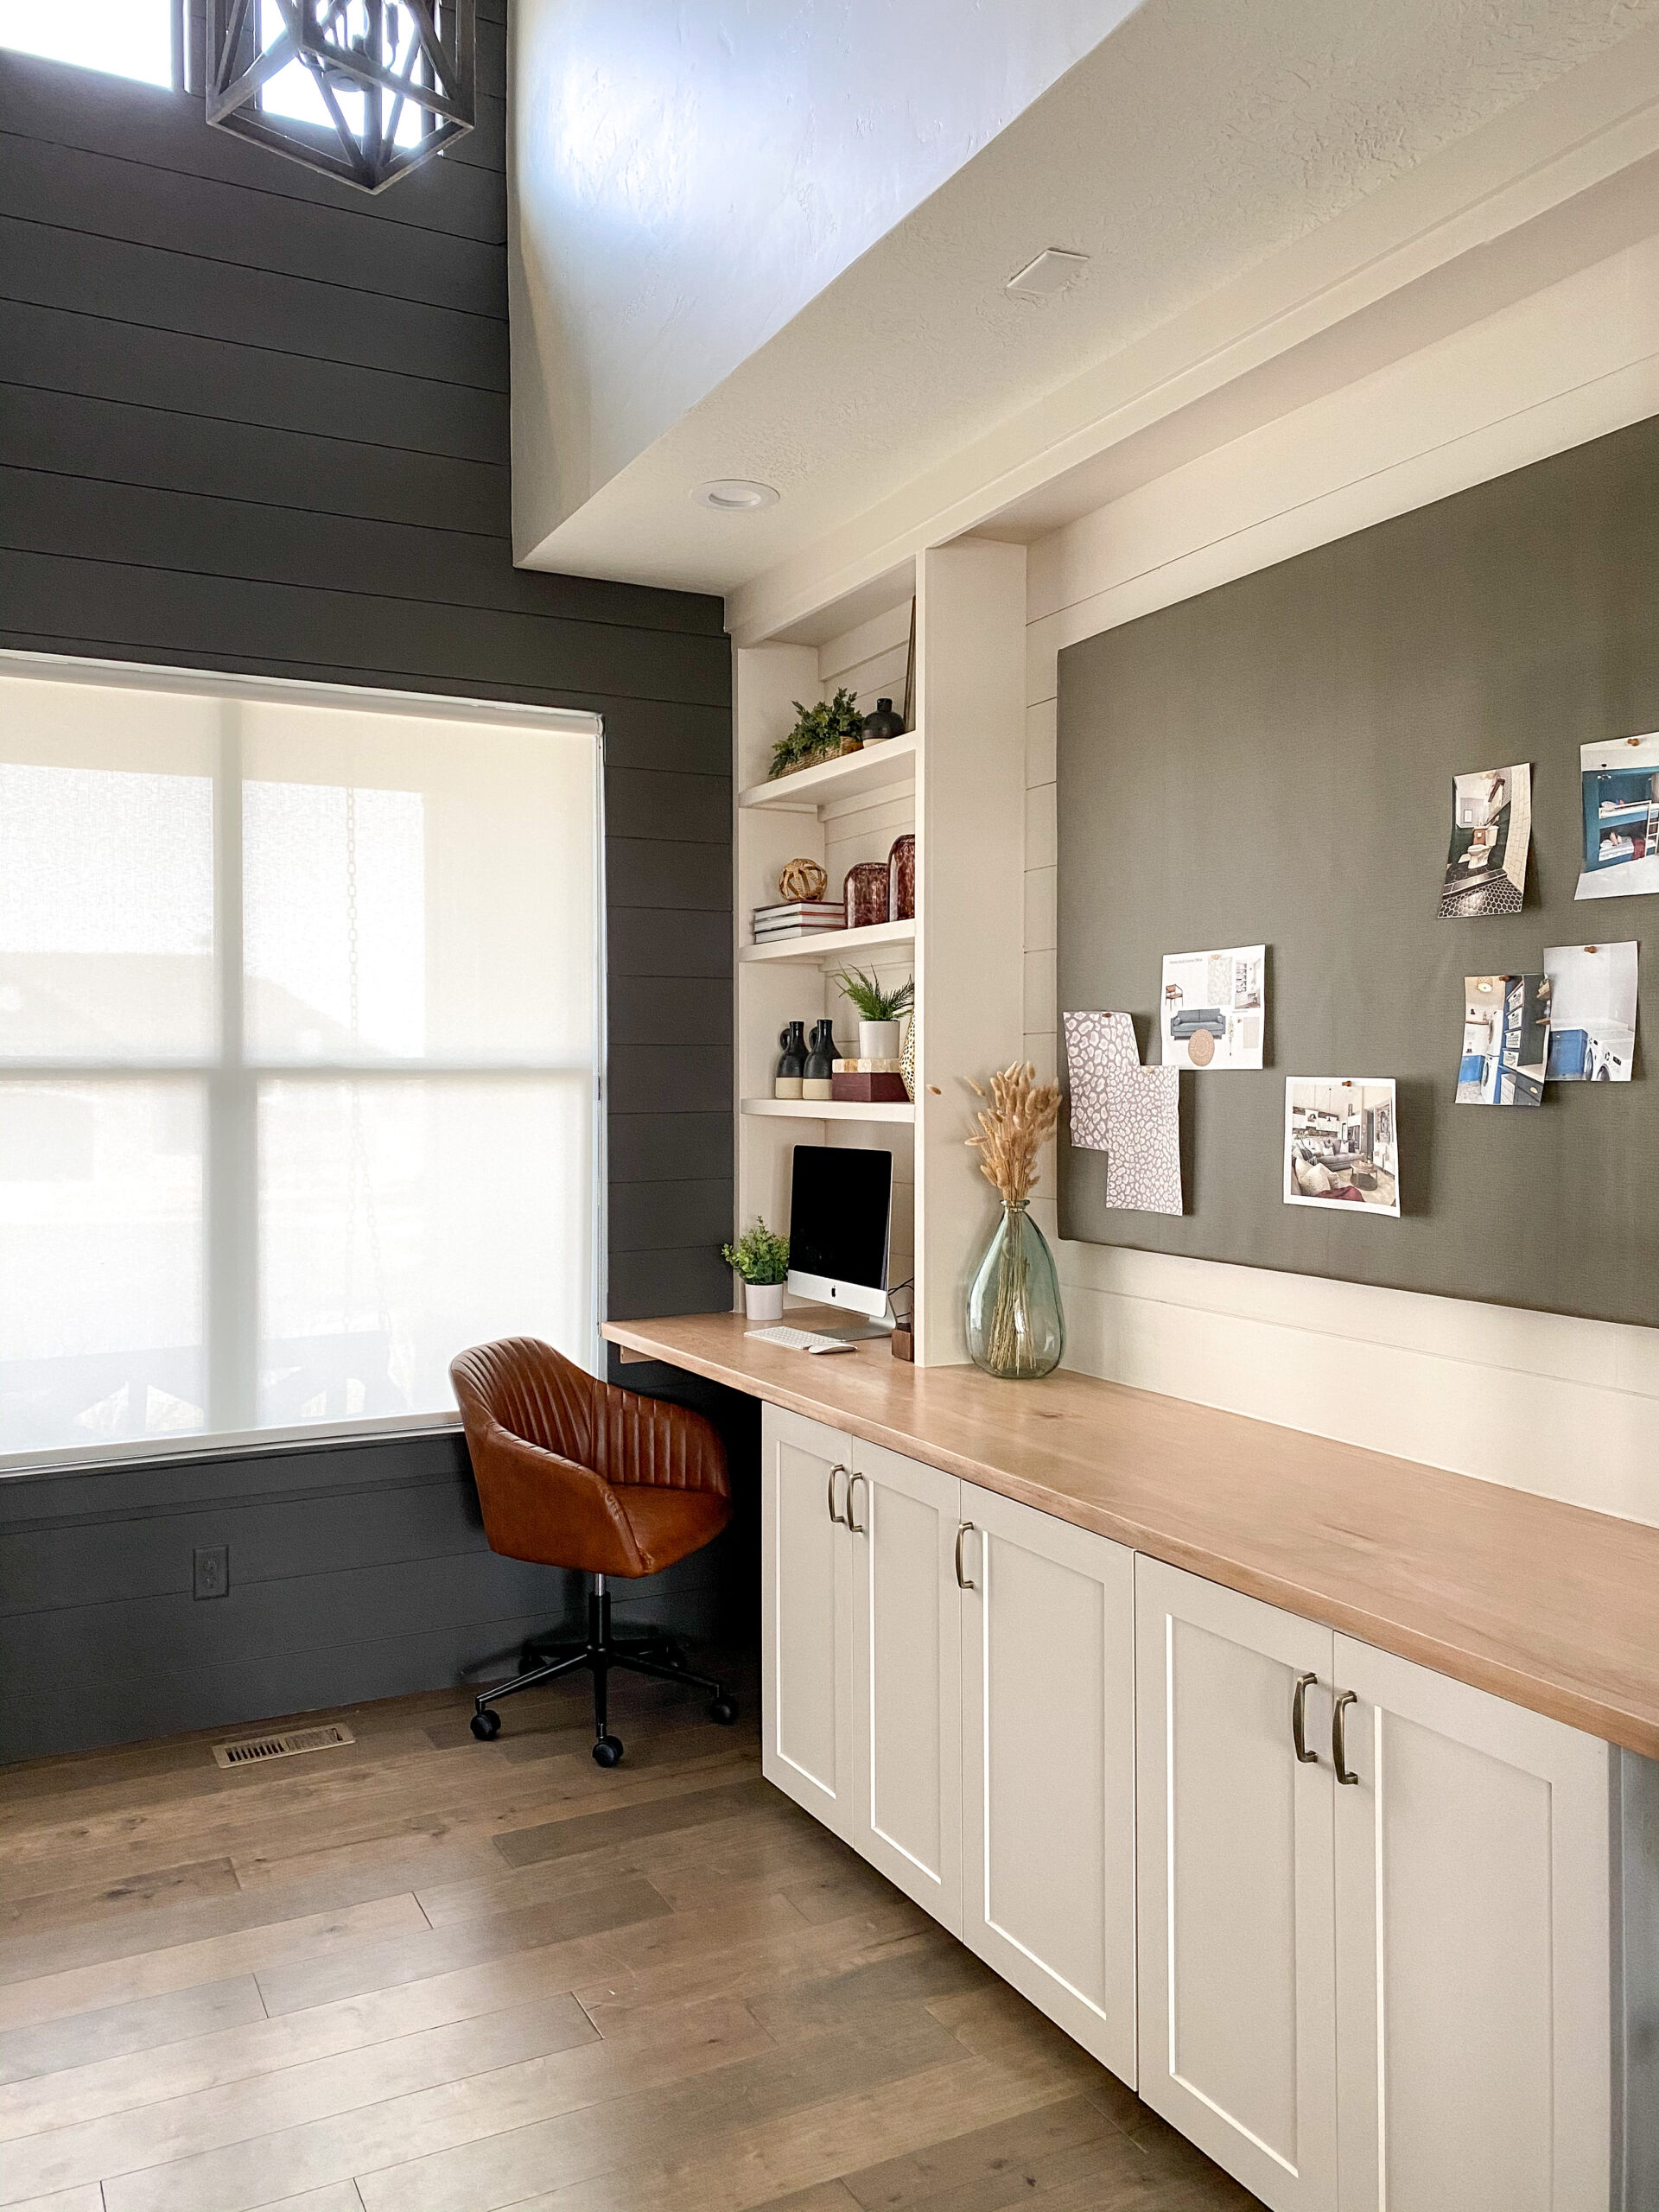
Finished product: