


How I Transformed My Bedroom Ceiling with Shiplap
Contributed by Made by Carli
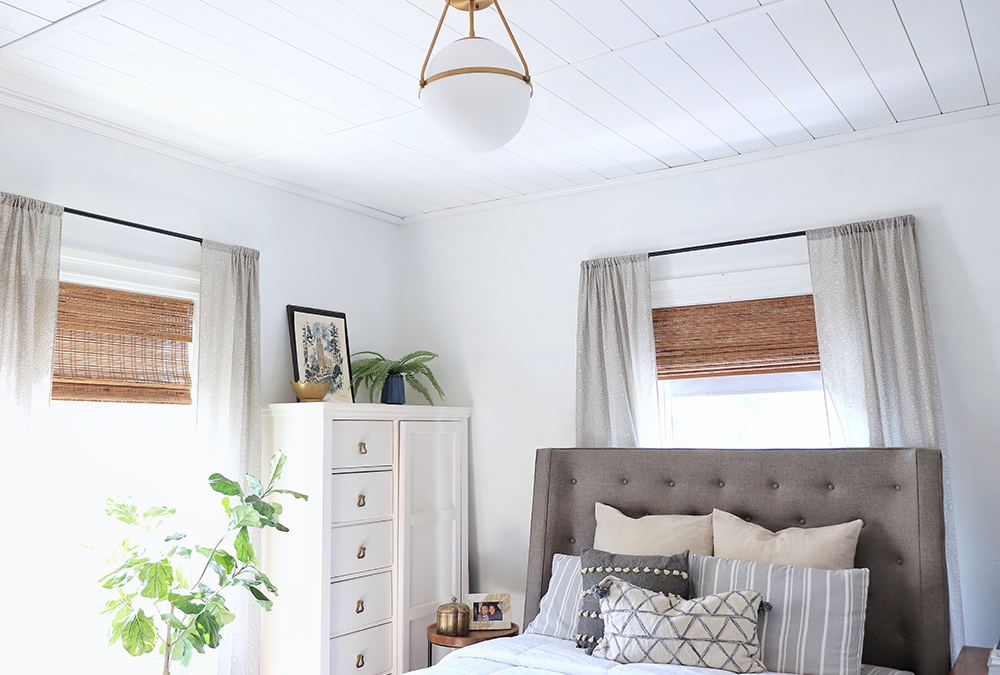
I have come to realize that PVC shiplap is the ultimate solution to covering up all the unsightly things that come along with an old home: dated tile, old wallpaper, popcorn ceilings, or in my case an unfinished ceiling.
After working with Royal’s PVC Shiplap in my bathroom, I knew it would be the perfect solution to my master bedroom ceiling dilemma, while also providing interest, character, and texture in our 140-year old Victorian home. For almost an entire year, we have stared at an unfinished bedroom ceiling: part plaster, part un-taped drywall, and I was completely over it.
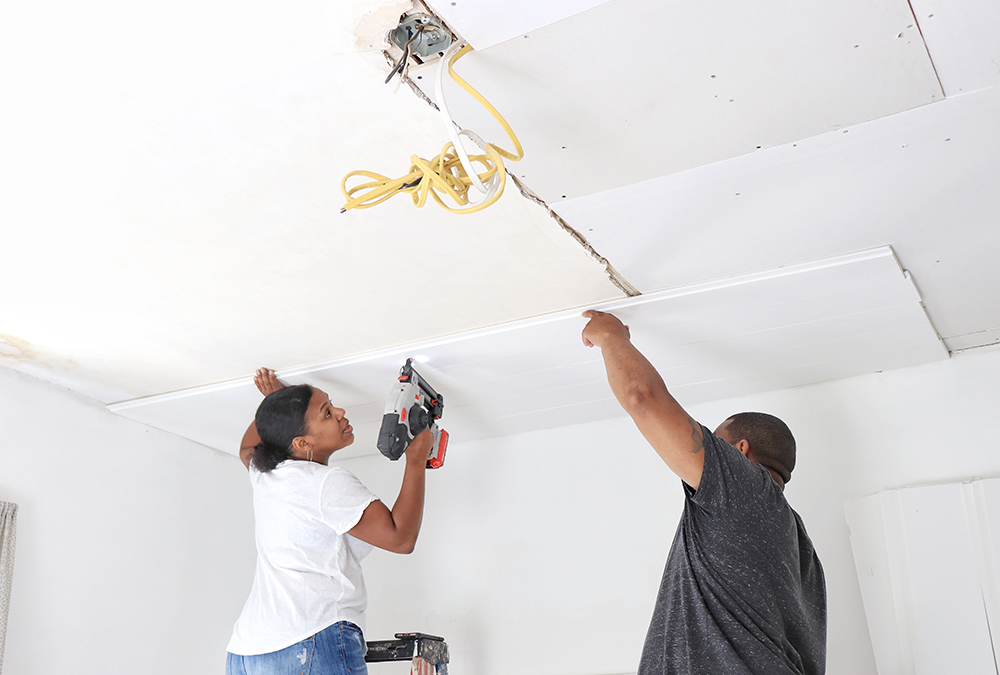
Using PVC shiplap allowed us to save time, and prevent the mess from taping the drywall and skim coating the plaster. It was such a fast and easy way to create a fresh, new ceiling in just a weekend. This project is definitely not a one person job, so I enlisted the help of my husband and son.
Here’s how we did it:
1) Before Getting Started
Make sure the plaster is in good shape (not loose or crumbling). If your ceiling is not in good shape, it is best to locate studs and install furring strips to the studs prior to installing the planks. We had previously demolished the damaged plaster and repaired it with drywall, so we were sure that our ceiling was sound. If you will be installing shiplap around a light fixture, be sure to shut off your power at the circuit box as a precaution.
2) Assemble Your Materials
For this project, we chose to work with Royal Building Products PVC Shiplap, Prefinished PVC Crown Molding and PVC Lattice Moulding, which can be purchased at your local hardware store or nearest Royal distributor. For a complete list of supplies used click here.
3) Decide On Your Design
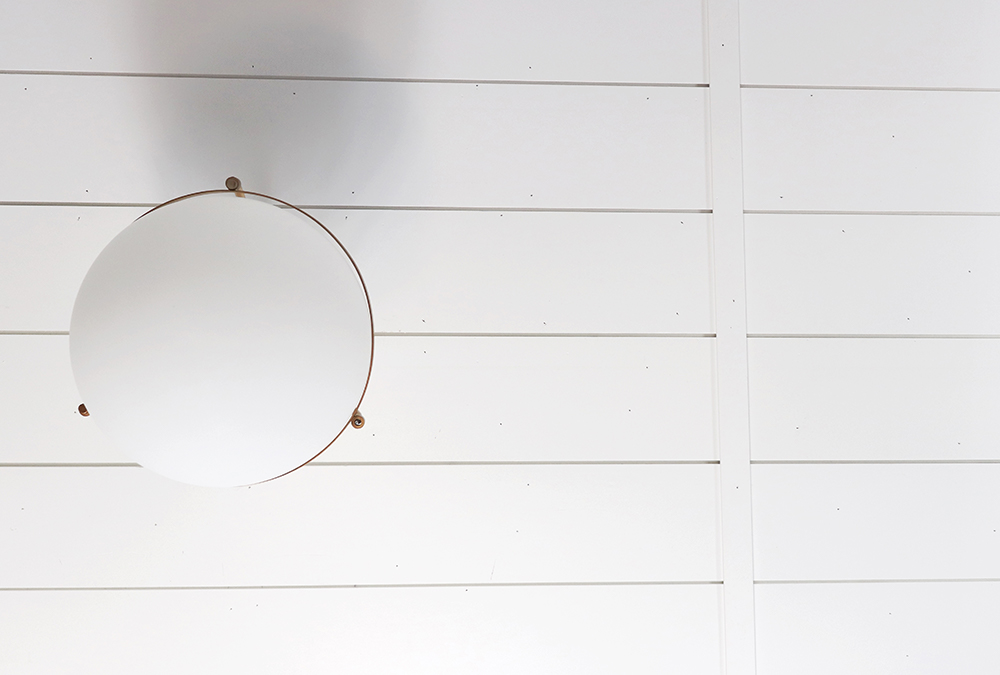
I prefer a more modern and streamlined look, so I chose to lay the boards straight as opposed to staggering the joints, which lends to a more rustic or farmhouse style. The planks I used are reversible. When joined, you can either have a beveled groove between the planks, or a nickel gap. I chose the nickel gap side.

4) Install Your First Board
Locate and mark your studs. I was able to eyeball where our studs were located based on where the drywall screws were located on our unfinished ceiling. If you don’t have a visual marker, I recommend using a stud finder to locate and mark your studs.
Install you first plank using a laser level to ensure that the plank is straight, this part is vital as it determines how straight the rest of your ceiling will be. If the first plank is uneven the entire ceiling will be uneven. If you know for a fact that your wall is uneven, create a small gap, don’t worry, it can be covered by trim or crown molding later, which will provide a professional looking finish.
Nail your plank to the ceiling using 2” brad nails, being sure to nail into the studs. The majority of my nails were done by “blind nailing,” meaning they were nailed where the next board would overlap (the rabbet portion of the plank), which limits the amount of nail holes that needed to be filled.
5) Install & Cut Around Any Obstacles As You Go
Install your next board, overlapping the other. And continue until you reach any obstacles, like the ceiling box where your light fixture may be located. Once you reach the ceiling box, mark the width of your ceiling box onto the plank, and trace a circle to be cut with a jigsaw.
Once you surpass any obstacles on the ceiling, the rest of the installation is pretty simple, especially if you have 2 helpers: one to pass you the planks, and the other to help support the plank while securing it to the ceiling.
Our ceiling is 13×13, and the planks we used were only 8’, so we installed the full planks on one portion of the room, and then cut them down using the miter saw for the other portion.
6) Trim the Perimeter
Once the ceiling was complete I trimmed the perimeter of the ceiling with Royal’s PVC Crown Molding. I added a strip of lattice to bind the seam where the planks met, and added an additional strip of lattice moulding to the other side of the room for symmetry.
7) Fill in Gaps
Fill any visible nail holes lightly with spackle, and caulk any large gaps or seams and enjoy. This was such an amazing way to add visual interest and character to our room. We are in awe of this transformation!
Supplies:
- Stud Finder
- Nail Gun
- 2” Brad Nails
- Level
- Royal Building Products PVC Shiplap
- Royal Building Products Prefinished PVC Crown Molding
- Royal Building Products 1.75-in x 8-ft PVC Lattice Moulding
- Spackle
- Miter Saw
- Jig saw
- Tape measurer